Understanding Your Nest Thermostat
Getting to Know Your Smart Thermostat
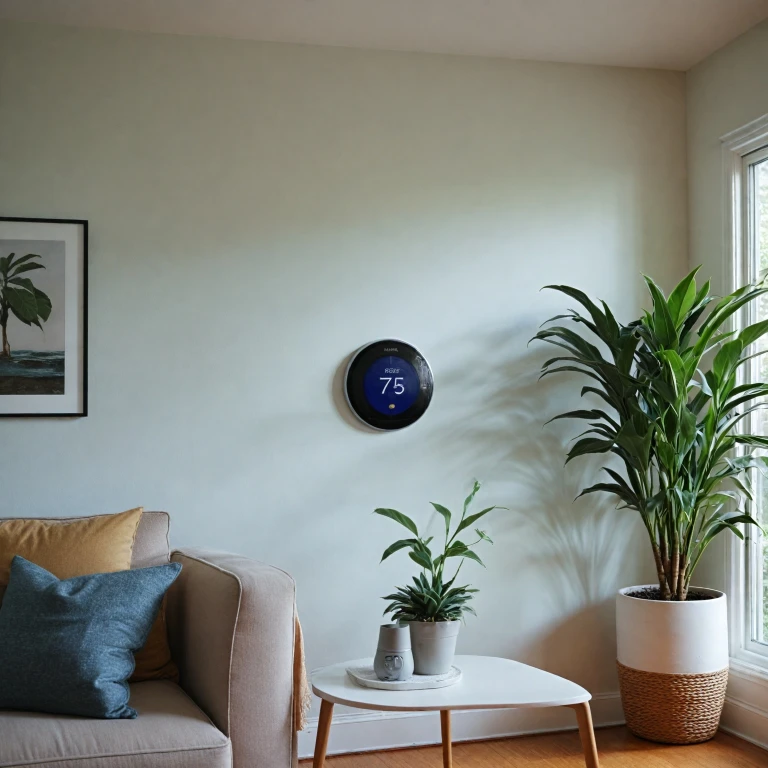
Before diving into the multitude of features that the Nest Thermostat offers, it’s crucial to understand the basic components that make this device a staple in smart home technology. The Nest Thermostat, primarily known for its sleek design and user-friendly interface, is engineered to control both heating and cooling systems efficiently, all while adapting to your lifestyle over time.
The standout feature of the Nest is its learning capability. As a learning thermostat, it observes your schedule and preferences, enabling it to automatically set optimal temperatures that yield energy savings. This ensures comfort without the hassle of constant manual adjustments.
When it comes to the device’s physical build, you’ll notice the signature ring that encircles the Nest. This ring allows you to select and turn through various settings. Adjusting the temperature can be done with a simple turn of this ring, and pressing the front face of the thermostat lets you change settings with ease.
The associated app, available for both Android and iOS, significantly increases the device's utility. Through the app, you can tap into various configurations, like setting temperature schedules or activating eco temperatures, which help you conserve energy efficiently when you’re away from home.
Not just about cooling and heating, your Nest Thermostat’s screen presents intuitive graphics and a color-coded interface. The calendar icon illustrates your programmed schedules, while the heat cool display color changes provide a clear indication of current settings.
Investing in a Google Nest product extends beyond just convenience. For those interested in bolstering their smart home experience, exploring related accessories like the Google Nest Trim Kit can offer an enhanced aesthetic and functional integration into your living space.
Installation and Setup Tips
Effortlessly Setting Up Your Nest
Installing your Nest thermostat may initially seem daunting, but breaking it down into manageable steps can simplify the process. Here's a step-by-step guide to get you started.
Positioning Your Nest
Begin by deciding the optimal spot for installing your Nest thermostat. Ideal placement is typically about five feet from the floor to ensure accurate temperature readings. Try to avoid locations where direct sunlight, drafts, or hidden heating sources may affect the thermostat's accuracy.
Installing the Nest Base
A crucial aspect is securely mounting the thermostat base. Use the mounting screws provided to fit the base to the wall. If your wall shows imperfections, the Nest Trim Kit can help in achieving a clean, professional look. Enhance your smart home with the Nest Trim Kit for a seamless fit.
Connecting Wires
After mounting the base, carefully connect the wires coming from your wall to your Nest thermostat. These wires control the different functions, such as heating, cooling, and fan control. Ensure you match each wire to the labeled terminal. The color-coded guide available in your Nest's packaging can assist with this step.
Attaching the Display
Once your wiring is complete, it's time to attach the Nest display to the base. Gently align it until it clicks into place. The display is crucial for controlling the thermostat's main functions, such as adjusting the temperature, accessing the schedule, and reviewing energy use.
Powering Up
Upon installation, turn your power back on and watch your Nest thermostat spring to life. Follow the on-screen instructions to connect the thermostat to your Wi-Fi network. This step is essential for accessing remote features through the Nest app and for real-time updates.
The Google Nest Thermostat is designed to be user-friendly, so don't hesitate to check out other features that allow you to set eco temperatures, create a heat-cool schedule, and more. After setup, you can delve into further settings to modify temperatures and save energy effectively. Your new Nest thermostat will offer a convenient way to maintain optimal comfort in your home.
Navigating the User Interface
Navigating the Nest Thermostat Interface
Your Nest thermostat offers an intuitive interface that combines physical interaction with digital precision, making it easier to control your home's temperature with ease. Understanding the interface will not only enhance your user experience but also ensure efficient thermostat management.
- Interactive Ring: The Nest thermostat features a prominent ring that you can turn to adjust the temperature settings. Turn the ring clockwise to set higher temperatures during cold days and counterclockwise to cool down your space.
- Display and Screen: The Nest's screen automatically lights up as you approach, displaying the current temperature and various settings. Tap the screen to access the menu and other features.
- Temperature Schedule: Use the calendar icon to manage your personalized temperature schedule. By setting a schedule, you can optimize energy use and save energy smartly. The built-in learning function of the Nest learning thermostat will adapt to your needs over time.
- Eco Mode: The feature labeled as "eco temperatures" can be easily accessed on the menu. Activating eco mode helps to save even more energy by automatically adjusting the thermostat when no one's home.
Explore the helpful options within the nest app to control your heating and cooling settings remotely. If you're seeking more insights into the power efficiency capabilities of smart thermostats, discover more about the benefits of ecobee smart thermostats.
Energy-Saving Features
Maximizing Energy Efficiency with Your Nest Thermostat
If you're looking to improve the energy efficiency of your home while maintaining comfort, your smart thermostat is equipped with a range of features to help you achieve this balance. Here’s how you can take advantage of these options:- Eco Temperatures: Switching to eco temperatures allows your Nest to operate in a range that saves energy but keeps your home comfortable. You can set these within the settings menu, ensuring that your Nest thermostat adjusts automatically when you’re away or during times of low energy demand.
- Scheduling: The thermostat’s learning capabilities will adapt over time to create a schedule based on your habits. If you prefer more control, use the calendar icon on the Nest app to set a precise temperature schedule, specifying when you want the heat or air conditioning to turn on or off, optimizing both comfort and energy consumption.
- Learning and Auto-Schedule: Initially, as you change temperature settings manually, your learning thermostat will record these changes and learn your preferences. Over time, your device will begin to automatically adjust, helping you save energy without you having to manually alter the thermostat's schedule frequently.
- Energy Saving Reports: The Nest app will provide monthly reports which detail your energy usage, including insights that help you identify periods where energy savings could be maximized. By learning from these reports, you can adjust your settings to improve efficiency further.
- Seasonal Adjustments: As the seasons change, so will your home's heating and cooling needs. Use the Nest's seasonal settings to preemptively change settings that suit the weather. This can include setting up a "Heat Cool" mode which automatically switches between heating and cooling based on outside temperatures.
Troubleshooting Common Issues
Resolving Common Nest Thermostat Issues
Experiencing issues with your Nest thermostat can be frustrating, but many common problems can be resolved with a few troubleshooting steps. Here are some practical solutions:- No Power on Display: If the screen is blank, check the wiring connections to ensure they are secure. It's essential the thermostat receives adequate power. Also, confirm the HVAC system is turned on, as this affects power delivery to the Nest thermostat.
- Wi-Fi Connection Problems: Ensure your Wi-Fi network is active. Revisit the network settings in the Nest app, and restart your home router, if necessary. A stable internet connection is crucial for the thermostat's functionality, including app-based control.
- Incorrect Temperature Readings: The thermostat’s placement can impact its heat and cool readings. Ensure it's not exposed to direct sunlight or placed near heat-generating appliances. Calibrating the nest temperature settings might also help in achieving accurate readings.
- Heating or Cooling Not Working: Check if the Nest app is set to the correct mode—heat, cool, or eco. Adjust the temperature schedule or manually change the thermostat's settings if the HVAC system doesn't turn on as scheduled.
- Unresponsive Thermostat: Occasionally, a restart can resolve minor glitches. To restart, navigate to the settings menu using the thermostat turn ring, select 'Restart', and follow the prompts. This process will not erase your saved settings or temperature schedules.