Understanding Your Honeywell Thermostat Model
Determining the Right Model: A Crucial First Step
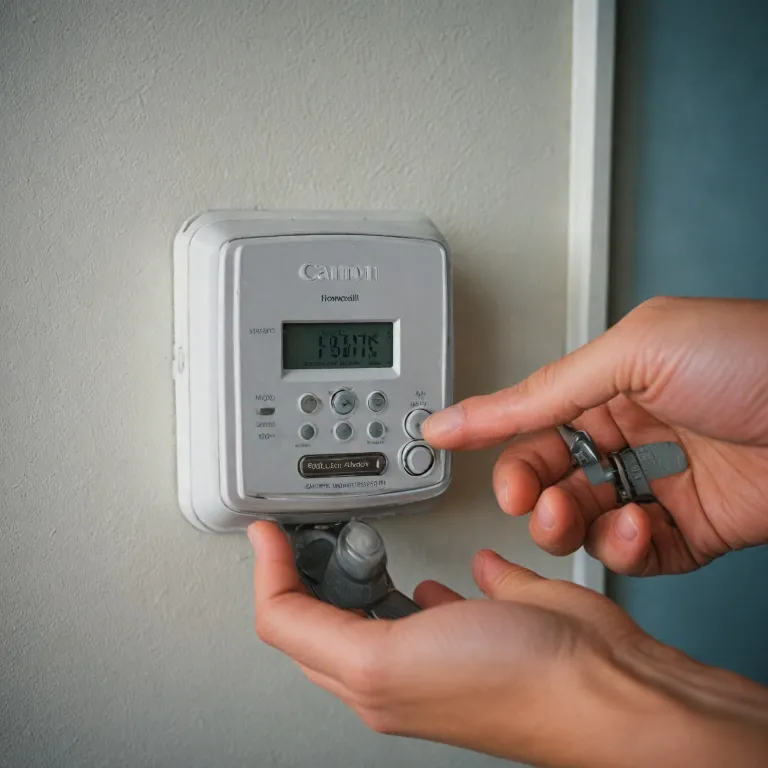
Before embarking on the task of changing the battery in your Honeywell thermostat, it's essential to identify the specific model you are working with. Honeywell thermostats are diverse in their range, each with distinct characteristics and compatible battery types. The understanding of your thermostat's model can significantly ease the process of locating and accessing the battery compartment. To start, check the exterior and back of your thermostat for the model number. This is usually printed on a label, which might also be found in the user manual if you still have it. Knowing your specific model will help you understand the layout and placement of the battery compartment. Most Honeywell thermostats have easily accessible battery compartments, often located at the top or behind the faceplate. However, the method to replace batteries may vary between models. For some, this involves simply sliding open a compartment, while others require the removal of the faceplate. It's also advisable to visit the manufacturer's website or consult relevant online posts to access a detailed description or diagram of your thermostat model. Understanding your model thoroughly ensures you are prepared for any specific battery replacement requirements. Furthermore, being familiar with your model helps understand how it integrates within your existing HVAC system, aiding in effective maintenance and operation. For those wondering if all smart thermostats need batteries, you might explore comprehensive insights on battery requirements in smart thermostats.Signs Your Thermostat Battery Needs Replacement
Recognizing the Need for a Battery Change
When it comes to Honeywell thermostats, identifying the right time to replace batteries is crucial to ensure your HVAC system operates efficiently. Several signs can help pinpoint when it's time to check and change the batteries in your device.
- Display Issues: If the display on your Honeywell thermostat starts to fade or becomes blank, this might indicate that the batteries are running low. The screen may also flicker or become unresponsive.
- Warning Messages: Many thermostat models will display a low battery warning. This alert usually appears a few days before the batteries deplete completely, so it gives you enough time to act.
- Temperature Management Problems: If your home's heating or cooling doesn’t work efficiently, or the thermostat isn’t responding accurately to set temperatures, weak batteries could be at fault.
- Device Beeping or Noises: Unusual beeping sounds from your thermostat can also be a sign that the batteries need attention.
These signs are your thermostat's way of signaling a need for battery maintenance. Understanding these indicators ensures your system remains efficient and helps prevent system malfunctions. You can refer to the user manual for your specific Honeywell thermostat model to better understand other troubleshooting methods.
Step-by-Step Guide to Replacing the Battery
Simple Steps to Provide a Power Boost to Your Honeywell
Replacing the battery in your Honeywell thermostat is a straightforward task that can keep your home's climate control running smoothly. Let's dive into how you can efficiently navigate this process. 1. Gather Your Tools- Before you begin, make sure you have the correct replacement batteries on hand. Most Honeywell models commonly use AAA alkaline batteries. Check your user manual to ensure you choose the right batteries for your thermostat models.
- You may need a flat-head screwdriver to help with the removal, depending on your unit's design.
- Accessing the battery compartment is often the initial step. In most Honeywell thermostat models, you will find it either at the top or slightly hidden at the back of the unit.
- Gently pull the thermostat from its wall mount or open the compartment door, depending on the specific design of your device.
- Safely remove the old batteries from the compartment. Ensure you do not exert excessive force to avoid damage to the compartment or its connectors.
- Disposing of old batteries properly is crucial as part of responsible maintenance.
- Carefully insert batteries by ensuring the polarity alignment matches the compartment guidelines, which are often indicated by + and - symbols.
- Ensure they fit snugly without forcing them into place, as improper placement can affect the performance of the unit.
- Once the new batteries are securely placed, reattach the thermostat to its wall mount or close the compartment door securely.
- Power up the unit to confirm it starts functioning as expected.
Common Mistakes to Avoid During Battery Replacement
Errors That Can Occur When Changing Batteries
Replacing the batteries in your Honeywell thermostat can seem straightforward, but there are some common mistakes that users often make. Being aware of these will help ensure a smooth process and proper functioning of your thermostat afterward.
- Incorrect Battery Placement: Make sure to place the batteries in the right orientation. Look for the '+' and '-' signs both on the batteries and inside the battery compartment to ensure correct placement.
- Using the Wrong Type of Batteries: Different Honeywell models may require different types of batteries. It's essential to check your specific thermostat user manual to determine whether aaa alkaline batteries or another type is needed.
- Forgetting to Reset the Thermostat: After changing the batteries, you might need to reset the thermostat for it to start working correctly again. Refer to the user guide if your thermostat doesn’t respond post-replacement.
- Neglecting Battery Compartment Cleaning: Over time, dust and debris can accumulate inside the battery compartment. Gently clean it with a soft brush each time you replace batteries to keep the contacts clear and ensure proper operation.
- Ignoring Battery Disposal Guidelines: Proper disposal of old batteries is important for environmental preservation. Follow local guidelines for battery disposal to stay compliant with HVAC safety and environmental standards.
Being mindful of these common errors can save you time and help maintain the efficiency of your Honeywell thermostat. With the batteries correctly inserted and the device reset, your thermostat should be ready to effectively manage your home's heating and cooling needs once again.
Maintaining Your Thermostat for Optimal Performance
Prolonging the Lifespan of Your Thermostat: Key Maintenance Tips
Ensuring that your Honeywell thermostat serves you efficiently for years demands attention to a few essential maintenance practices. Not only do these steps help in avoiding unexpected issues, but they also contribute to optimal heating and cooling performance.- Regularly Check the Battery Compartment: Periodically inspect the battery compartment for any signs of corrosion or damage, as these can affect battery performance. Keep the compartment clean and ensure the connections are intact.
- Choose the Right Batteries: While most Honeywell thermostat models work best with AAA alkaline batteries, always refer to the user manual to confirm. Avoid using batteries that aren’t recommended for your specific model.
- Stay Ahead of Battery Replacement: Don't wait for signs of a low battery, such as dim displays or power issues. Set a schedule—perhaps every six months or aligned with the change in seasons—to insert fresh batteries.
- Keep the Sensor Area Clean: Dust and debris can compromise the thermostat's sensors. Ensure the area around your thermostat is clear and wipe the device gently with a soft, dry cloth.
- Review User Manuals Periodically: Each Honeywell thermostat model may have specific maintenance guidelines. Following the user manual ensures you perform the correct actions for your particular device.
- Ensure a Stable Installation: If the thermostat isn’t mounted securely, it might not read the air temperature accurately. Periodic checks to confirm it’s firmly attached to the wall can help.
Troubleshooting Post-Replacement Issues
Address Issues Promptly After Battery Replacement
Replacing batteries in your Honeywell thermostat is generally straightforward, but occasionally, issues might arise post-replacement. Here's how to tackle them efficiently.
Ensure Correct Battery Placement
Check if the batteries are inserted correctly in the battery compartment. Incorrect placement is a common oversight that can prevent the thermostat from starting. Ensure the AAA alkaline or your chosen batteries follow the correct polarity as indicated in the user manual.
Verify Battery Contact Points
Sometimes, the contact points in the compartment might not be perfectly aligned with the batteries, affecting the thermostat's functionality. Inspect these connections and adjust if necessary to ensure proper contact.
Conduct a Quick Power Cycle
If the thermostat still doesn’t work, perform a power cycle. Remove the batteries completely for a moment and reinsert them. This step often helps reset the thermostat, enabling it to start functioning again.
Check Thermostat Settings
Post battery replacement, the thermostat settings, such as heating and cooling preferences, might reset. Review and adjust them to match your preferred settings as needed. Refer to your user manual for details on setting preferences across Honeywell thermostat models.
Consult the User Manual
If issues persist, consult the Honeywell thermostat manual. It provides model-specific guidance and further troubleshooting tips. Online resources and support posts can also be a handy guide for troubleshooting.
Seek Professional Help
Should the thermostat still not function properly, there may be other underlying issues with the HVAC system or the thermostat itself. In such cases, seeking professional assistance ensures that the thermostat and the entire system are working optimally.