Understanding Your Honeywell Thermostat Model
Identify Your Honeywell Thermostat for Proper Use
To ensure effective operation of your Honeywell thermostat, it is crucial to first identify your thermostat model. Different models might have unique specifications, battery types, and replacement methods. Determining the correct model will not only help you in pinpointing the exact steps to replace batteries correctly but also aids in resolving common issues after battery replacement. Knowing your model ensures you understand the proper width of batteries and helps you navigate the battery compartment without causing damage. If your model is a programmable thermostat, it might have more nuanced setting options compared to more basic models. Understanding these specificities can prevent errors and extend the life of your device. For users unfamiliar with the process, identifying your model typically involves removing the mounting plate, where model information is usually displayed. If you're still unsure of your model specifications, consulting the user manual or visiting manufacturer resources online can provide clarity. For more insights into understanding your Honeywell thermostat's battery-related concerns, consider visiting this informative blog post which emphasizes the importance of comprehending your device’s battery dynamics creatively.Signs Your Thermostat Battery Needs Replacement
Recognizing When It's Time for Battery Replacement
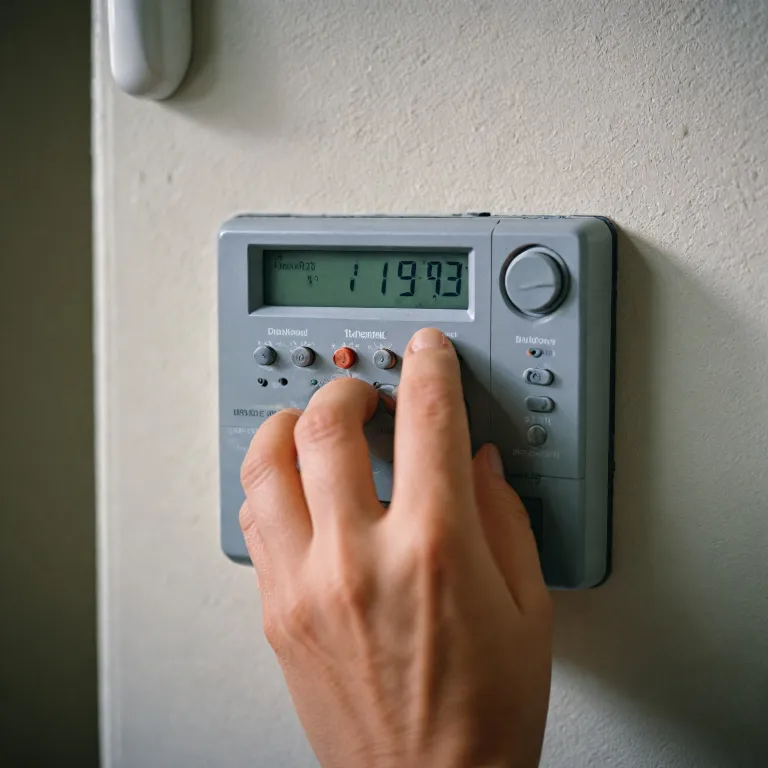
Your Honeywell thermostat plays a crucial role in maintaining your home's comfort, and ensuring that the batteries are in top condition is essential. A primary sign that your thermostat battery needs replacement is the low battery alert on the display. It's a pro move to stay ahead of this alert to avoid any inconvenience.
Another indication is when the thermostat screen dims or becomes unresponsive. This often signifies that the battery life is nearing its end. In models with a programmable thermostat feature, settings or schedules might not be saved if the power is low, which can affect the overall efficiency of your home temperature regulation.
Depending on the Honeywell model, the battery compartment may differ in width. If you notice any resistance when trying to operate or adjust settings, it's time to inspect the compartment. Regular inspection helps catch these issues early, ensuring uninterrupted comfort.
Stay informed on best practices with our comprehensive guide on ensuring longevity of your thermostat batteries. This will greatly help in maintaining the device's efficiency and prevent any unforeseen temperature control issues at your home.
Step-by-Step Guide to Replacing the Battery
Step-by-Step Guide to Battery Replacement
Replacing the batteries in your Honeywell thermostat doesn't have to be a daunting task. With a few simple steps, you can ensure your home maintains the desired comfort levels. Let's dive into this straightforward battery replacement process.- Gather Necessary Supplies: Before starting, make sure you have the required tools and fresh alkaline batteries. It's recommended to use high-quality AA or AAA batteries, depending on your model, to ensure optimal performance.
- Power Down the Thermostat: If your Honeywell thermostat is equipped with a power switch, turn it off before proceeding. This step is crucial for your safety, as it prevents any electrical concerns during the battery exchange.
- Access the Battery Compartment: Carefully remove the unit from its mounting plate on the wall. Usually, there's a top-release mechanism or side clips that need to be pressed to lift the unit away gently. The battery compartment is typically situated at the back.
- Remove Old Batteries: Once the unit is detached, locate the battery compartment. Slide open or lift the cover to access the batteries. Take out the old ones, ensuring no corrosion or damage is present inside the compartment.
- Insert New Batteries: Place the new batteries into the compartment, making sure they align with the correct polarity indicators (+/-). This ensures that your Honeywell thermostat functions properly without any "batteries low" alerts.
- Reattach the Thermostat: Once you've inserted the new batteries, align the unit back onto its mounting plate securely. Snap it into place, ensuring no loose connections exist.
- Test the Thermostat: Finally, power up the thermostat and check if it resumes normal function. Look for any alerts or notifications on the screen that might indicate an issue.
Choosing the Right Batteries for Your Thermostat
Selecting Appropriate Power Sources for Optimal Performance
Choosing the right batteries for your Honeywell thermostat is crucial for ensuring consistent performance and extended device lifespan. When it's time to replace batteries, opting for alkaline batteries is generally recommended due to their longevity and reliability compared to standard zinc-carbon variants. Alkaline batteries maintain a steady power output, crucial for programmable thermostats where precision in maintaining the home environment is vital. Finding the right match for your thermostat often involves checking the existing batteries within the battery compartment located at the top or back of the device. Always consult your Honeywell thermostat user manual for specific battery requirements or consult an online guide. When handling batteries, ensure the stroke width with which you pull and insert is gentle, to prevent damaging the device. Replacing batteries with the wrong type can trigger the 'low battery alert' prematurely or compromise the thermostat's ability to maintain programmed settings. In addition to using the correct batteries, it's beneficial to regularly check and address the battery compartment to keep it clean and free of any debris that could affect the connection and overall efficiency of the thermostat. Pro tip: Establish a routine to replace batteries low in power before they die completely, to avoid unnecessary disruptions to your home’s climate control. Doing so will help maintain the efficiency of your Honeywell thermostat and ensure it continues to function reliably. While replacements can generally be accomplished quickly and easily (often within minutes), in rare circumstances where issues persist post-replacement, consulting with a professional technician might be necessary. Following these guidelines will help to fill any gaps in maintaining your home’s climate control system efficiently and ensure you have a power source matching your thermostat's needs.Troubleshooting Common Issues After Battery Replacement
Addressing Common Pitfalls of Battery Replacement
When you undertake the task of replacing your Honeywell thermostat battery, it’s crucial to monitor potential issues that might arise post-replacement. Here’s how you can troubleshoot common problems and ensure smooth operation of your thermostat:- Verify Battery Orientation:
- Securely Attach the Thermostat:
- Check Battery Condition:
- Ensure Proper Fit:
- System Reset:
Maximizing Thermostat Efficiency with Regular Maintenance
Keeping your Honeywell thermostat efficient
Regular maintenance of your Honeywell thermostat can ensure its consistent performance and long lifespan. Once you have successfully performed a battery replacement, it's essential to continue with routine checks and maintenance procedures. By doing so, you can avoid potential issues and maintain your thermostat’s efficiency.
- Monitor Battery Alerts: Pay attention to any low battery alerts that your thermostat might display. These alerts are crucial as they indicate when it’s time to replace batteries before they drain completely. This can prevent unexpected shutdowns.
- Check Battery Compartment: When replacing batteries, ensure that the battery compartment is clean and free from corrosion. This will help in maintaining a good connection and prevent any future replacement thermostat issues.
- Use Quality Batteries: Always opt for high-quality alkaline batteries. These are likely to last longer and won't leak into your thermostat, which can occur with lower quality, generic batteries.
- Regular Expert Reviews: Consider scheduled professional evaluations to inspect for potential issues that you might skip. A professional can help with adequately reinstall thermostat settings and ensure the mounting plate is secure.
- Programming Checks: For those with a programmable thermostat, routine reviews of your schedule settings are beneficial. This ensures that the thermostat is working at its optimum efficiency, adapting to your home’s energy needs.
- Stroke Width Setting: Users should ensure the settings for stroke width and other configurations are properly adjusted to match their home requirements.
Remember, regular maintenance is key to maximizing the efficiency and lifespan of your thermostat. Consistent checks and being proactive in replacements will save time and energy in the long term.