
What are omnistat 2 RS232 commands and why use them
How RS232 Commands Enable Advanced Thermostat Control
Omnistat 2 RS232 commands are a set of serial instructions that allow users to communicate directly with Omnistat thermostats. These commands are essential for anyone looking to program, monitor, or automate their thermostat beyond the standard user interface. By leveraging RS232 communication, users can control thermostat functions such as mode, stage, setpoint, and fan status, making it possible to integrate the device into larger control systems or home automation setups.
Why Use RS232 for Omnistat Thermostats?
RS232 is a well-established serial communication protocol, commonly used for reliable device-to-device data exchange. For programmable communicating thermostats like the HAI Omnistat series, RS232 commands provide granular access to system parameters. This includes reading the current temperature, adjusting heat setpoint or cool setpoint, and changing the mode (heat, cool, auto, or off). The ability to send and receive data through a serial port means users can automate responses to environmental changes or user preferences, enhancing comfort and energy efficiency.
- Direct device control: Adjust settings such as temperature, fan mode, and system mode remotely.
- Integration: Connect Omnistat communicating thermostats with broader home automation systems, including those using cat cable or pin connector setups.
- Monitoring: Retrieve real-time data on current system status, stage, and setpoint values for both heat pump and conventional systems.
Benefits for Home Automation Enthusiasts
For users interested in advanced programming or integrating their Omnistat thermostats with other smart devices, RS232 commands are invaluable. They allow for custom scripts, automated schedules, and responsive control based on occupancy or external conditions. This level of control is particularly useful for managing multiple devices or zones, ensuring each area maintains the desired temperature and mode auto settings.
For those comparing communication protocols for smart thermostats, understanding the differences between Zigbee and Z-Wave for your smart thermostat can help determine if RS232 is the right choice for your system.
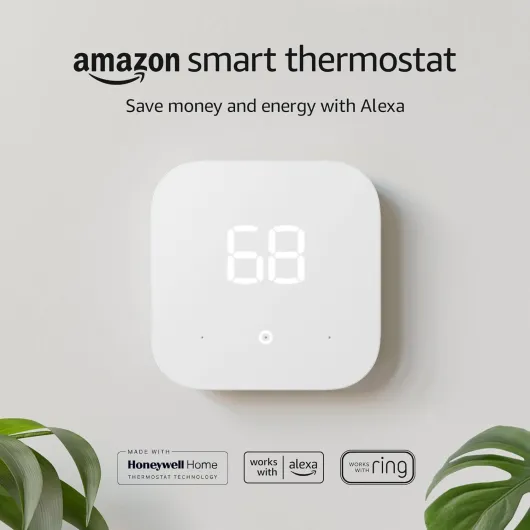
- + Energy saving — advertised to save money and energy
- + Works with Alexa and Ring — integrates with popular smart home platforms
- + Simple 1-pack — single thermostat unit for straightforward replacement
- + Amazon brand — from a well-known smart home ecosystem
Basic setup for RS232 communication with omnistat 2
Preparing Your Omnistat Thermostat for Serial Communication
Before you can start programming or controlling your Omnistat thermostats using RS232 commands, you need to set up a reliable serial connection. This step is essential for anyone looking to access advanced features like adjusting the heat setpoint, cool setpoint, or switching the system mode between heat, cool, or auto. Here’s how to get started:
- Identify the RS232 Port: Most Omnistat communicating thermostats have a dedicated serial port, often a DB9 pin connector. Check your device manual for the exact location and pinout.
- Choose the Right Cable: Use a quality serial cable, such as a CAT cable with the appropriate adapters if needed. Reliable cabling ensures stable data transmission between your control system and the thermostat.
- Connect to the Control System: Plug the cable into your control system or computer. Make sure the port settings (baud rate, parity, data bits, stop bits) match those required by the Omnistat device. Incorrect settings can prevent the thermostat from responding to commands.
- Power Up and Address the Device: Ensure the thermostat is powered on. Each Omnistat thermostat may have a unique address, especially in multi-device setups. Knowing the correct address is crucial for targeting the right device during programming or control.
- Test the Connection: Use terminal software or your automation platform to send a basic command. If the display or fan status updates, your serial connection is working.
Optimizing Placement for Reliable Communication
Where you install your Omnistat thermostat and its serial connection hardware can impact performance. Avoid locations with electrical interference or extreme temperatures. For more tips on finding the best spot for your smart thermostat, check out this guide on optimal thermostat placement.
Setting Up for Advanced Control
Once your serial connection is established, you can begin exploring advanced features. This includes adjusting the fan mode, monitoring the current system stage, or integrating with programmable communicating control systems. Proper setup ensures you get the most out of your Omnistat 2, whether you’re managing a heat pump, controlling multiple zones, or automating your home’s comfort settings.
Common omnistat 2 RS232 commands and their functions
Essential RS232 Commands for Omnistat Thermostats
When working with Omnistat 2 thermostats, understanding the most common RS232 commands is key to effective control and integration. These commands allow users to read and set parameters such as temperature setpoints, mode, fan status, and system stage. The communication happens over a serial port, typically using a pin connector and cat cable, ensuring reliable data transfer between your control system and the thermostat device.
- Read Current Status: This command queries the thermostat for its current mode (heat, cool, auto), temperature, setpoints, and fan status. It’s essential for monitoring the system’s real-time state and is often used in home automation programming.
- Set Heat Setpoint / Cool Setpoint: These commands adjust the desired temperature for heating or cooling. By sending the correct data to the thermostat address, users can change the heat setpoint or cool setpoint remotely, which is especially useful for programmable communicating thermostats.
- Change System Mode: Switch between modes such as heat, cool, off, or mode auto. This is crucial for adapting to seasonal changes or user preferences, and can be automated through control systems.
- Fan Mode Control: Commands to set the fan to on, auto, or circulate. Managing fan mode helps optimize comfort and energy efficiency, especially in heat pump systems.
- Stage Control: For multi-stage systems, commands can specify which stage (for example, stage 1 or stage 2) is active. This is important for advanced HVAC setups and ensures the system operates efficiently.
- Display and User Data: Some commands allow you to update the display or retrieve user-specific data, supporting custom control and feedback for the user.
Command Structure and Communication
Each RS232 command follows a specific structure, typically including the device address, command number, and relevant data. For example, to set a new heat setpoint, the command must specify the correct thermostat address and the desired temperature value. Omnistat communicating thermostats require precise formatting to ensure the command is accepted and executed.
| Function | Command Example | Description |
|---|---|---|
| Read Current Temperature | 0x0A 0x01 0x00 | Requests the current temperature from the device |
| Set Heat Setpoint | 0x0A 0x02 [setpoint] | Sets the heat setpoint to the specified value |
| Set Cool Setpoint | 0x0A 0x03 [setpoint] | Sets the cool setpoint to the specified value |
| Change Mode | 0x0A 0x04 [mode] | Changes the system mode (heat, cool, auto, off) |
| Fan Mode | 0x0A 0x05 [fan mode] | Sets the fan to on, auto, or circulate |
It’s important to consult the official Omnistat 2 RS232 protocol documentation for the full list of commands and data formats. Proper serial connection setup, as discussed earlier, ensures these commands are transmitted without errors.
Advanced Integration and Compatibility
For users looking to integrate Omnistat thermostats with broader home automation systems, understanding how RS232 commands interact with other control systems is crucial. Compatibility with programmable communicating thermostats and the ability to control thermostat functions remotely are significant advantages. If you’re comparing communication protocols for your smart thermostat setup, you may find this guide on Zigbee vs Z-Wave for smart thermostats helpful for making informed decisions.
Troubleshooting RS232 communication issues
Identifying and Resolving Communication Problems
When working with Omnistat thermostats using RS232 commands, communication issues can disrupt your ability to control the device or retrieve data. Here are practical steps to help you diagnose and fix common problems:- Check Serial Connection: Ensure the serial port and pin connector are securely attached. If you’re using a CAT cable, verify that it’s not damaged and is properly seated in both the thermostat and control system.
- Verify Port Settings: Confirm that the baud rate, parity, stop bits, and data bits match between your Omnistat device and the programming software. Mismatched settings can prevent the thermostat from responding to commands.
- Test with Basic Commands: Try sending a simple command, such as requesting the current mode or setpoint. If you receive no response, the issue may be with the serial connection or address configuration.
- Address and Device Number: Double-check the device address and number in your control system. Omnistat communicating thermostats require the correct address to respond to commands, especially in multi-device setups.
- Power Cycle: Sometimes, simply restarting the thermostat or control system can resolve temporary glitches in communication.
- Monitor Fan and System Status: If the fan mode or system stage does not update as expected, review the command syntax and ensure the correct data format is used. Incorrect programming can lead to unexpected results in fan status or mode auto settings.
Common Error Indicators and Solutions
- No Response: If the Omnistat does not display any change or send data back, check the serial cable, port configuration, and device address.
- Incorrect Data: If the thermostat displays the wrong heat setpoint, cool setpoint, or mode, verify the command structure and ensure you’re sending the right data for the desired function (heat, cool, or auto).
- Partial Functionality: If some commands work but others do not (for example, you can control the heat pump but not the fan), review the documentation for command compatibility with your specific Omnistat model.
Best Practices for Reliable Communication
- Use shielded cables for longer serial connections to minimize interference.
- Label each device and port to avoid confusion in multi-thermostat control systems.
- Regularly update your programming scripts to accommodate firmware changes in programmable communicating thermostats.
- Document all changes to system configuration, including user access and display settings, for easier troubleshooting in the future.
By following these steps, users can maintain stable communication with their Omnistat thermostats and ensure reliable control over their home’s heating and cooling systems.
Integrating omnistat 2 RS232 commands with home automation systems
Connecting Omnistat 2 to Home Automation Platforms
Integrating Omnistat 2 RS232 commands with home automation systems allows users to control their thermostat remotely and automate temperature settings. The RS232 serial connection acts as a bridge between the Omnistat thermostats and control systems like home automation hubs or custom software. To achieve reliable integration, ensure the serial port and pin connector are properly matched, and use a quality cat cable for stable data transmission.
Mapping Commands for Automation
When programming your home automation system, map each Omnistat 2 command to specific actions. For example, you can set the heat setpoint, cool setpoint, or change the mode (heat, cool, auto, or off) based on user preferences or schedules. The system can also monitor the current temperature, fan status, and system mode, then adjust the thermostat accordingly. This level of control is especially useful for programmable communicating thermostats or heat pump systems where precise management is needed.
- Setpoint adjustments: Automate changes to heat or cool setpoints based on time of day or occupancy.
- Mode switching: Switch between heat, cool, or mode auto depending on weather or user input.
- Fan control: Adjust fan mode or monitor fan status for energy efficiency.
- Display and feedback: Use the system to display current temperature, mode, or setpoint on user interfaces.
Addressing Device Communication
Each Omnistat device has a unique address for serial communication. When integrating with control systems, ensure the correct device address is used in every command. This avoids conflicts and ensures the right thermostat responds to programming instructions. For homes with multiple communicating thermostats, maintaining a clear address map is essential for reliable operation.
Automation Best Practices
- Test all RS232 commands in a controlled environment before deploying to your live system.
- Document each command, its function, and the expected data response for easier troubleshooting.
- Regularly update your automation scripts to accommodate firmware changes or new Omnistat features.
- Monitor serial connection health to prevent data loss or miscommunication between devices.
By carefully integrating Omnistat 2 RS232 commands with your home automation system, you can achieve seamless control over your thermostat, enhance comfort, and optimize energy usage. Always follow manufacturer documentation and best practices for secure and reliable operation.
Security and best practices when using RS232 commands
Protecting Your Serial Connection and Data
When working with RS232 commands to control your Omnistat thermostats, it’s important to secure the serial connection. Exposed serial ports or unsecured cat cables can be vulnerable to tampering. Always use shielded cables and, if possible, keep the pin connector and serial port in a locked or restricted area. This helps prevent unauthorized access to your system and ensures that only trusted users can interact with your device.Authentication and Access Control
Omnistat communicating thermostats often lack built-in authentication on the RS232 interface. To mitigate risks:- Limit physical access to the device and serial connection.
- Use access control systems or secure enclosures for your control thermostat hardware.
- Restrict user permissions in your home automation programming to prevent accidental or malicious changes to the heat setpoint, cool setpoint, or fan mode.
Best Practices for Command Programming
When programming commands for your Omnistat 2, always double-check the address and data values. Incorrect values can cause the thermostat to enter the wrong mode, set the wrong temperature, or disrupt the current system operation. Document your command sequences, especially if you’re integrating with other control systems or using programmable communicating thermostats. This helps you track changes and troubleshoot issues more efficiently.Monitoring and Logging
Enable logging of all serial communication with your Omnistat device. This allows you to review what commands were sent, when, and by which user or system. Monitoring helps you spot unusual activity, such as unexpected changes in heat or cool setpoints, or unauthorized attempts to change the mode auto or fan status.Firmware and System Updates
Keep your Omnistat thermostats and any connected control systems updated with the latest firmware. Updates often include security improvements and bug fixes that can protect your system from vulnerabilities. Check with your device manufacturer for recommended update procedures and schedules.Physical Security and Environmental Considerations
Place your Omnistat device and serial connection in a secure, climate-controlled area. Avoid locations where the cat cable or pin connector could be easily unplugged or damaged. Protecting the physical setup is just as important as securing the data and programming.Summary Table: Security Checklist for Omnistat RS232 Communication
| Security Aspect | Action |
|---|---|
| Physical Access | Restrict and monitor access to device and serial port |
| Authentication | Implement access control at system level |
| Command Validation | Double-check address, data, and mode values |
| Logging | Enable and review communication logs |
| Firmware Updates | Regularly update thermostat and control systems |
| Physical Protection | Use secure enclosures and shielded cables |