Why thermostat wiring colors matter for smart thermostats
Why Wire Colors Are Crucial for Smart Thermostat Installation
When upgrading to a smart thermostat, understanding thermostat wiring colors is more than just a technical detail—it’s essential for a safe and successful installation. Each wire color in your HVAC system serves a specific function, connecting to a terminal on the thermostat that controls heating, cooling, fan, or power. Mixing up these wires can lead to system malfunctions or even damage your new smart thermostat.
Smart thermostats rely on precise connections to manage your heating and cooling system efficiently. The correct wire connects to the right terminal, ensuring your thermostat can communicate with your HVAC system, control the fan, and switch between heating and cooling modes. For example, the red wire usually supplies power, while the white wire typically controls the heating system. The blue wire or common wire (often labeled as "C") is vital for providing continuous power to many smart thermostats.
- Wire colors act as a guide—they help you match each thermostat wire to the correct terminal on your new device.
- Incorrect wiring can disrupt your HVAC system, causing issues with heating, cooling, or even the fan operation.
- Smart thermostats often require a common wire (C-wire) for power, which older systems may lack or use a different color for.
Before starting your installation, it’s important to identify each wire and its function. This helps prevent confusion and ensures your smart thermostat works as intended. If you’re unsure about any wire or terminal, consulting a thermostat hookup diagram can provide extra clarity and confidence during the process.
Common thermostat wiring colors and their functions
Decoding the Most Common Thermostat Wire Colors
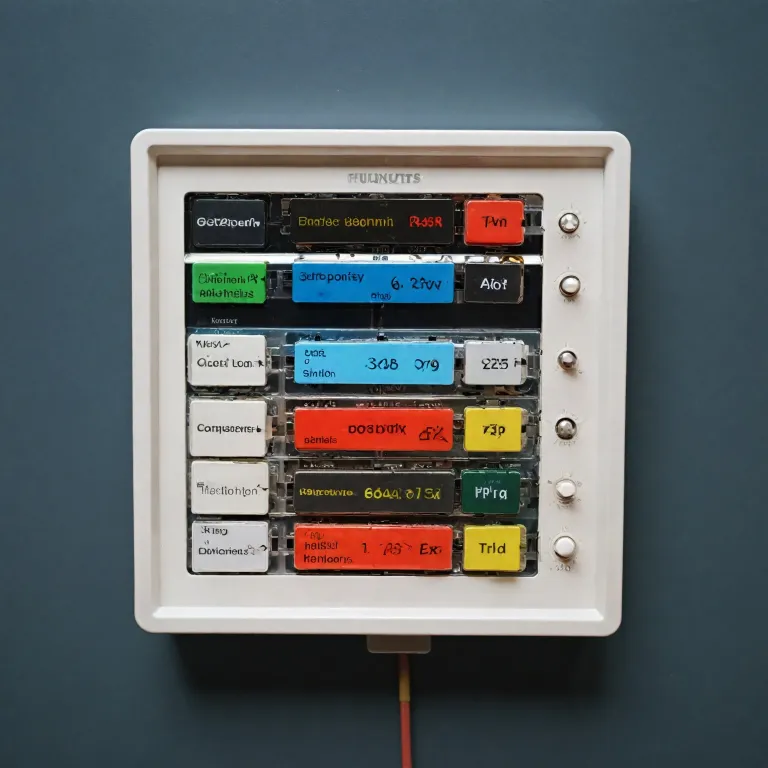
When you look behind your thermostat, you’ll see a bundle of wires, each with a specific color. These colors aren’t random—they’re a guide to how your HVAC system operates. Understanding what each wire does is crucial for a smooth smart thermostat installation and for troubleshooting issues down the line.
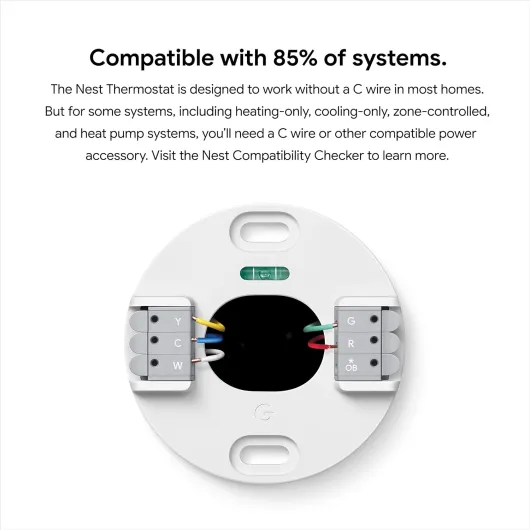
- Red wire (R or Rh/Rc terminal): This is the power wire. It supplies 24V AC from your HVAC system’s transformer to the thermostat. In some systems, you’ll see two red wires: Rh for heating and Rc for cooling.
- White wire (W terminal): Controls the heating system. When your thermostat calls for heat, it sends a signal through this wire to start the furnace or heating equipment.
- Yellow wire (Y terminal): This wire connects to the cooling system. It tells your air conditioner or heat pump to turn on when cooling is needed.
- Green wire (G terminal): Responsible for the fan. This wire activates the blower fan in your HVAC system, circulating air throughout your home.
- Blue or Black wire (C terminal): Known as the common wire, or C wire. It provides a continuous flow of power to your smart thermostat, which is essential for features like Wi-Fi connectivity and display screens.
- Orange wire (O/B terminal): Found in heat pump systems. The orange wire controls the reversing valve, switching the system between heating and cooling modes.
Some systems may have additional wires for advanced features or multi-stage heating and cooling. Always check your system’s manual or wiring guide before starting any installation.
Why Wire Colors Can Vary
While these color standards are common, not every installation follows them perfectly—especially in older homes or with DIY wiring jobs. Sometimes, wire colors might not match their function, which can cause confusion during installation or troubleshooting. If you’re unsure, or if your wiring doesn’t match these guidelines, it’s wise to consult a licensed electrician for thermostat replacement to avoid damaging your smart thermostat or HVAC system.
Knowing what each wire color typically represents helps you identify your thermostat wires and ensures a safer, more reliable installation. If you’re moving on to identifying your own wires, keep these color codes in mind as a reference.
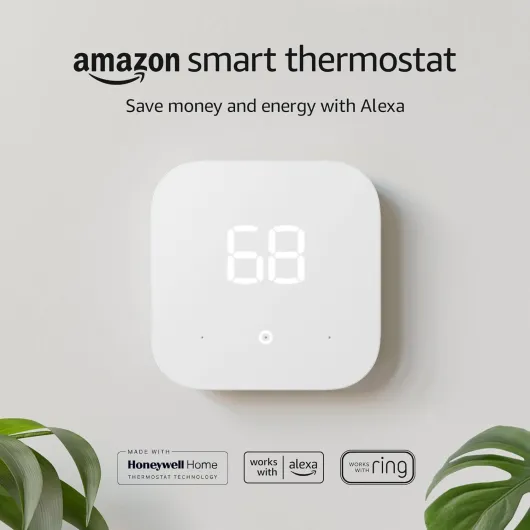
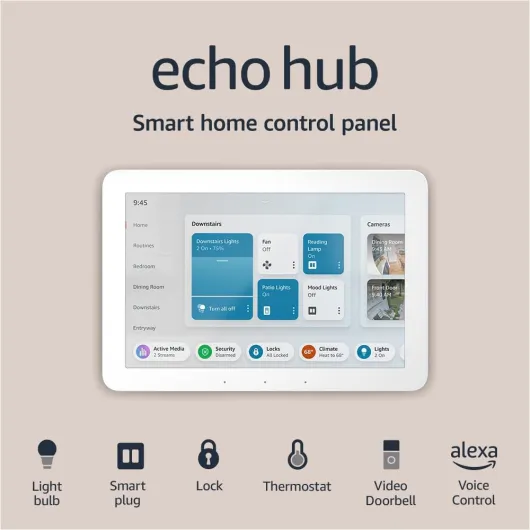
- + Energy saving — advertised to save money and energy
- + Works with Alexa and Ring — integrates with popular smart home platforms
- + Simple 1-pack — single thermostat unit for straightforward replacement
- + Amazon brand — from a well-known smart home ecosystem
How to identify your thermostat wires
Steps to Recognize and Label Your Thermostat Wires
Before you start installing a smart thermostat, it’s essential to identify the wires coming from your HVAC system. Each wire color typically connects to a specific terminal on your thermostat, but actual wiring can vary depending on your heating and cooling system, previous installations, or even the age of your home. Here’s a practical guide to help you recognize and label your thermostat wires safely and accurately.
- Turn off power to your HVAC system at the breaker. This step is crucial for your safety and prevents accidental damage to your system or thermostat wiring.
- Remove the old thermostat cover. Most covers simply snap or pull off, revealing the wiring and terminal labels.
- Take a clear photo of the existing wiring before disconnecting anything. This photo will serve as a reference if you need to double-check wire placement during installation.
- Look for terminal labels (like R, W, Y, G, C, O/B) next to each wire. The color of the wire often matches its function, but always trust the terminal label over the color alone.
- Label each wire with a small sticker or masking tape as you disconnect it. Write the terminal letter (not just the color) on the label for clarity.
Common Wire Colors and Their Typical Functions
| Wire Color | Typical Terminal | Function |
|---|---|---|
| Red wire | R (or Rc, Rh) | Power from the transformer |
| White wire | W | Heating system control |
| Yellow wire | Y | Cooling system control |
| Green wire | G | Fan control |
| Blue or Black wire | C | Common wire (provides continuous power for smart thermostats) |
| Orange wire | O/B | Heat pump reversing valve |
Keep in mind, some HVAC systems or older installations may use different wire colors or have extra wires for advanced features. If your system includes a heat pump, the orange wire often connects to the O/B terminal, controlling the reversing valve for heating and cooling modes.
For a deeper dive into how smart thermostats use these wires to optimize your heating and cooling, check out this guide to ENERGY STAR certified smart thermostats.
- + Smart thermostat with Wi-Fi for remote app control
- + Programmable schedules to help reduce energy use
- + Energy-saving features and usage reminders
- + Easy setup for many typical homes
- + Voice control compatibility with Google Assistant (and works with Alexa)
Challenges with older homes and non-standard wiring
Dealing with Unexpected Wiring in Older Homes
When installing a smart thermostat in an older home, you might run into some surprises with the thermostat wiring. Unlike modern hvac systems that follow standard wire colors and terminal labels, older heating and cooling systems often use non-standard wiring or lack certain wires entirely. This can make the installation of a smart thermostat more challenging, especially if you’re expecting to match wire colors to functions easily.
- Non-standard wire colors: In older homes, the wire colors may not match today’s common standards. For example, you might find a blue wire used for heat instead of the typical white wire, or an orange wire that doesn’t connect to a heat pump terminal as expected.
- Missing wires: Many older systems don’t have a dedicated common wire (often called the C wire), which provides continuous power to smart thermostats. Without this wire, your new thermostat may not function properly or at all.
- Unlabeled or frayed wires: Over time, labels can wear off and insulation can degrade, making it hard to identify which wire connects to which terminal on your hvac system or thermostat.
What to Watch Out For
Before starting the installation, carefully inspect your thermostat wires and terminals. Take note of any wires that don’t match the color guide or that seem to have been repurposed. If your system wire setup doesn’t include a common wire, or if you see unusual wire colors at the terminal thermostat connections, you may need to consider alternative installation methods or additional accessories.
Some smart thermostats offer power extenders or adapters to help bridge the gap when a C wire is missing. However, these solutions may not work with every hvac system, especially if your heating or cooling system is very old or uses proprietary controls.
Tips for Navigating Old Wiring
- Photograph your existing thermostat wiring before disconnecting anything. This can help you remember which wire connects to each terminal.
- Use a multimeter to test wires if you’re unsure about their function. Never assume a wire’s purpose based solely on its color.
- Consult your system’s installation manual or look for a wiring diagram inside the hvac control panel for guidance.
If you encounter confusion or uncertainty about your heating cooling system’s wiring, don’t hesitate to reach out to a professional. Proper installation is crucial for both safety and the reliable operation of your smart thermostat.

- + Wi-Fi connected for remote control and app access
- + Video doorbell compatible to link entry alerts with the thermostat
- + IAQ control (indoor air quality) to monitor and manage air
- + Customizable touchscreen with an intuitive, modern interface
- + Sleek black design that fits contemporary interiors
Connecting your smart thermostat: step-by-step tips
Preparing for Installation: Safety and Tools
Before you start connecting your smart thermostat, always turn off power to your HVAC system at the breaker. This prevents accidental shorts and protects both you and your system. Gather a small screwdriver, wire labels, and your thermostat’s installation guide. Take a photo of your existing thermostat wiring for reference.Matching Wire Colors to Terminals
Most smart thermostats use standard wire colors, but always double-check your system. Here’s a quick guide to common wire colors and their typical functions:- Red wire (R or Rc/Rh terminal): Power from the transformer
- White wire (W or W1 terminal): Controls heating system
- Yellow wire (Y or Y1 terminal): Controls cooling system
- Green wire (G terminal): Controls fan
- Blue or Black wire (C terminal): Common wire for continuous power
- Orange wire (O/B terminal): Used for heat pump systems to control reversing valve
Connecting the Wires to the Smart Thermostat
- Label each wire as you disconnect it from the old thermostat. This helps avoid confusion, especially if wire colors don’t match standard conventions.
- Insert each wire into the corresponding terminal on your new smart thermostat. Make sure the wire is securely fastened and no copper is exposed.
- For systems with both heating and cooling, ensure both the heating (W) and cooling (Y) wires are connected to their respective terminals.
- If you have a heat pump, the orange wire usually connects to the O/B terminal. Double-check your system type before connecting.
- The common wire (C) is essential for most smart thermostats, as it provides continuous power. If your system lacks a C wire, consult your thermostat’s installation guide for alternatives.
Testing and Final Steps
Once all wires are connected, mount the thermostat to the wall and restore power at the breaker. Follow the on-screen setup instructions to configure your HVAC system type, heating and cooling preferences, and Wi-Fi connection if needed. If your thermostat doesn’t power on or your heating/cooling system doesn’t respond, double-check each wire terminal for secure connections and correct placement. If you encounter non-standard wiring or if your system wire colors don’t match typical guides, it’s best to pause and consult a professional. Proper thermostat wiring ensures your smart thermostat can control your heating, cooling, and fan functions safely and efficiently.When to call a professional for thermostat wiring
Signs You Should Get Expert Help
Smart thermostat installation can seem straightforward, especially after reviewing wire colors, functions, and identification steps. However, there are situations where calling a professional is the safest and most efficient choice. Here’s when you should consider expert help:
- Unfamiliar or missing wires: If your system has wires that don’t match standard color codes, or if you’re missing a crucial wire like the common (C) wire, a technician can identify and resolve the issue.
- Complex HVAC systems: Homes with advanced heating and cooling setups, such as multi-stage systems, heat pumps, or dual-fuel systems, often require specialized knowledge to connect wires to the correct terminal.
- Old or non-standard wiring: Older homes may have outdated or non-standard thermostat wiring, which can complicate installation and risk damaging your HVAC system.
- Power or control issues: If your thermostat doesn’t power on after installation, or if the system fails to respond, a professional can safely troubleshoot wiring and terminal connections.
- Uncertainty about wiring diagrams: If you’re unsure about how to read wiring diagrams or which wire connects to which terminal, a certified installer can guide you through the process and ensure everything is set up correctly.
Benefits of Professional Installation
Bringing in an HVAC technician or electrician offers several advantages:
- Ensures your smart thermostat is wired correctly to control both heating and cooling systems.
- Prevents accidental damage to your thermostat, HVAC system, or wiring.
- Guarantees compatibility with your system, especially if you have a heat pump or unique system wire configuration.
- Provides peace of mind that your installation meets safety and manufacturer guidelines.
What to Expect from a Professional
A qualified installer will:
- Identify all thermostat wires and their functions, regardless of color.
- Check for a common wire and add one if needed for smart thermostats.
- Connect each wire to the correct terminal on your new thermostat.
- Test your heating and cooling systems to confirm proper operation.
- Offer guidance on using your smart thermostat for optimal comfort and energy savings.
While many homeowners can handle basic thermostat wiring, don’t hesitate to call a professional if you encounter any uncertainty. Proper installation protects your investment and ensures your smart thermostat delivers the control and efficiency you expect.
