Introduction to Smart Thermostats
Exploring the Revolution in Home Comfort
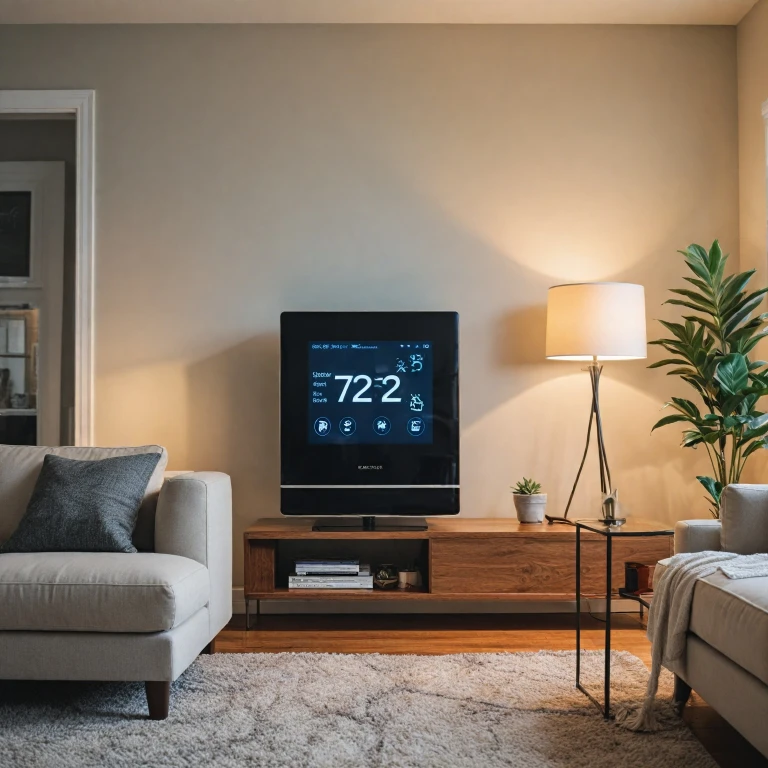
In recent years, smart thermostats have emerged as a groundbreaking innovation in home heating and cooling systems. These devices promise enhanced efficiency, intuitive features, and energy savings. By leveraging advanced technology, smart thermostats adapt to your habits and help regulate the indoor climate with precision.
At the heart of this technological marvel lies the C wire, an essential component for many modern thermostats to function optimally with existing HVAC systems. However, don't let the complexity of terms like wires and systems intimidate you. Understanding key concepts like these can pave the way for a seamless smart thermostat experience.
Smart thermostats come equipped with various features, from learning algorithms to remote control via smartphone apps. Their popularity stems not only from their energy efficiency but also from their ability to integrate with other smart home devices. Systems like the Nest thermostat are paving the way, setting high standards in the market.
Yet, with the array of thermostat wiring combinations and potential installation obstacles, it's essential to be well-informed. For newcomers and enthusiasts alike, deciphering terms such as terminal, blue wire, and power supply can transform confusion into clarity. Whether dealing with a heat pump or an air conditioning unit, a better grasp of these elements contributes to successful installation and operation.
Before embarking on your smart thermostat journey, it's wise to familiarize yourself with the different types of smart thermostats available and their compatibility with existing HVAC systems. For a comprehensive overview, consider exploring an in-depth guide on various thermostat models, including setup and functionality.
The C Wire Explained
Decoding the Mystery of the C Wire
For many homeowners looking to modernize their HVAC systems with a smart thermostat, understanding the role of the C wire can be crucial. The C wire, or "common wire," plays an essential part in providing power to your smart thermostat, which demands more power than traditional models. Unlike older thermostats that relied on batteries, smart thermostats require constant power to maintain connectivity and enable features, such as remote control and energy usage reporting.
Your HVAC system sends power to various components through its wiring, and the C wire acts as a return path, ensuring the flow is continual even when the heating or cooling system isn't active. Typically, the C wire is responsible for transporting 24V AC power from your HVAC system's control board to the thermostat, keeping it powered and operational.
Recognizing the C wire can sometimes be tricky. It's frequently blue or black but can vary depending on the system or installer. During installation, you might notice the thermostat wiring colors don't always match the expected standards. So it’s a good idea to check your wiring setup or consult professionals to avoid incorrect installations and mishaps.
For those embarking on the transition to a smart system, knowing the details about C wires can make all the difference. Understanding your thermostat wiring layout provides you with the confidence needed to handle common tasks or troubleshoot potential issues effectively.
How to Identify if You Have a C Wire
Recognizing Your Thermostat's Wire Setup
Determining whether you have a C wire in your HVAC system can be straightforward with the right approach. When dealing with smart thermostats, the presence of a C wire, often referred to as the "common wire," is essential as it provides a continuous power supply to the thermostat. Here's a step-by-step guide on how to check if your current system includes one. First, you’ll want to turn off the power to your heating and air conditioning systems via your circuit breaker to ensure safety. Afterward, remove the front faceplate of your thermostat to expose the wiring beneath. You'll typically see a variety of colored wires connected to different terminals. The most common wire colors include red, which provides the power supply, and yellow, green, and white wires, each serving specific functions. Look for a wire connected to the C terminal. This is often a blue or black wire. If you spot one, congratulations—you have a C wire! However, don’t worry if you don’t see a wire connected to the C terminal; some systems have an unused wire tucked away in the wall, or slightly hidden behind the thermostat. Gently pull on any excess wire to see if the blue wire appears. If there isn't a C wire present or no unused wire to be found, you might need to install a C wire adapter or consider other solutions as highlighted in other posts. Utilizing an adapter is often a quick fix to circumvent the common wire dilemma, especially for those using systems like nest thermostats. Navigating the intricacies of thermostat wiring can be daunting, especially for non-techies, but understanding your HVAC system's current setup is crucial. For those who need further guidance on wiring configurations, explore our comprehensive guide on understanding your lux thermostat for insights on identifying and working with various wire terminals and adapters.Alternatives to the C Wire
Exploring C Wire Alternatives: Powering Your Smart Thermostat
When dealing with smart thermostats, the C wire, or common wire, plays a crucial role in powering the device continuously. However, not every home or HVAC system comes equipped with this essential component, leading to potential complications in the installation process. Fortunately, several solutions are available if you find yourself without a C wire. One popular approach is using a power adapter designed explicitly for systems lacking a C wire. These adapters connect to existing thermostat wiring, effectively providing the necessary power supply by tapping into other available wires, such as the red wire or blue wire. This solution is compatible with most smart thermostats, effectively enabling you to bypass the need for a direct C wire connection. Another alternative involves utilizing an unused wire within your current thermostat wiring setup. In some cases, HVAC systems feature spare wires that remain inactive. If such a wire is available, it can be repurposed as a C wire by appropriate connectivity to the HVAC system's control board. This method may require some thermostat wiring knowledge or the assistance of a professional to ensure proper execution and compatibility with your specific system. On rarer occasions, older HVAC systems might need rewiring to incorporate a common wire. This process might involve accessing the HVAC system’s internal components and wiring, which can be intricate and demands a higher skill level. Enlisting the help of a certified technician is advisable to avoid any unintended damage to the system. In any of these cases, ensuring that your smart thermostat receives a reliable power supply is essential for its optimal functionality. By exploring these alternatives, you'll be able to harness the advantages of smart thermostats without the immediate presence of a C wire, paving the way for efficient heating and cooling management in your home.}Installation Tips for Smart Thermostats
Navigating the Installation Process
When it comes to installing a smart thermostat, having a clear understanding of your wiring system is essential. A successful installation hinges on accurately identifying each wire and connecting it correctly to ensure optimal connectivity with your HVAC system. Firstly, take a moment to identify the wires connected to your current thermostat. Most common ones include:- Red wire: This is usually your power supply wire.
- White wire: Often associated with your heating system.
- Yellow wire: Typically linked to the air conditioning unit.
- Green wire: Generally controls the fan.
- Blue/Black wire: This could be your C wire, or common wire, which powers the smart thermostat.
Connecting the Smart Thermostat
Once you've identified the wires, follow these basic steps to connect your smart thermostat:- Disconnect the Old Thermostat: Carefully remove your existing thermostat from its mount. Label the wires as you disconnect them to make reconnections easier.
- Mount the New Thermostat Base: Secure the new thermostat base onto the wall, ensuring it aligns with the existing wiring terminal.
- Wire Connection: Take each labeled wire and connect them to the corresponding terminal of your new smart thermostat. Make sure they are securely fastened to avoid loose connections that could lead to malfunction.
- Connect the C Wire: If your system supports it, connect the C wire to the designated terminal. This is crucial for providing continuous power to your smart thermostat. If there’s no C wire, look for alternatives, such as a wire adapter.
- Attach the Thermostat Face: Once all wires are connected, gently snap the smart thermostat onto the base.
- Restore Power: Turn your HVAC system back on and test the thermostat to see if it functions correctly.
Final Checks and Considerations
After installation, configure the thermostat according to your preferences, setting up schedules and integrating it with any necessary smart home systems. Should you encounter any issues related to wiring or power, consulting your thermostat’s manual or a professional HVAC technician will be beneficial. Common issues often involve loose connections or incorrect wire placement on the control board. Correctly installing your smart thermostat ensures a seamless run of your heating and cooling systems, providing you with comfort and energy efficiency.Troubleshooting Common C Wire Issues
Troubleshooting Tips for The C Wire in Smart Thermostat Installation
Experiencing issues with the common wire while setting up your smart thermostat can be frustrating. Here's a guide to help you address some common C wire problems:
- Check Your Thermostat Wiring: Begin by ensuring the correct thermostat wires are connected to the right terminals. Double-check the wire colors and confirm they match the terminal designations.
- Inspect Power Supply: The power supply to your smart thermostat may be disrupted if the wiring is loose. Thoroughly examine the wire connections at both the thermostat and control board ends of your HVAC system.
- Verify the Use of a Wire Adapter: If you have installed a wire adapter to compensate for a missing C wire, ensure that it is functioning correctly and all wires are securely connected.
- Test for Unused Wires: It's possible an unused wire, like a blue wire, could be utilized as a C wire. Carefully inspect your existing thermostat wiring to see if there’s an available wire that can be repurposed.
- Examine the HVAC Control Board: An issue at the control board could impact the power flow to your thermostat. In some heating systems, a malfunctioning control board could be the cause of the C wire problem.
- Consult Your HVAC System Manual: Often, troubleshooting guides specific to your heating cooling system are available in the manual. Check for guidance related to thermostat wiring connections and C wire specifications.
- Seek Professional Assistance: If your thermostat or HVAC system issues persist, it might be time to consult an HVAC expert who has experience with smart thermostats. A professional can help diagnose and fix complex wiring problems.
Tackling these common issues will help ensure your smart thermostat functions correctly and efficiently. Addressing C wire problems promptly can lead to improved performance of both your heating and air conditioning systems.