Understanding Your Honeywell Thermostat Model
Identify Your Honeywell Thermostat Variant with Ease
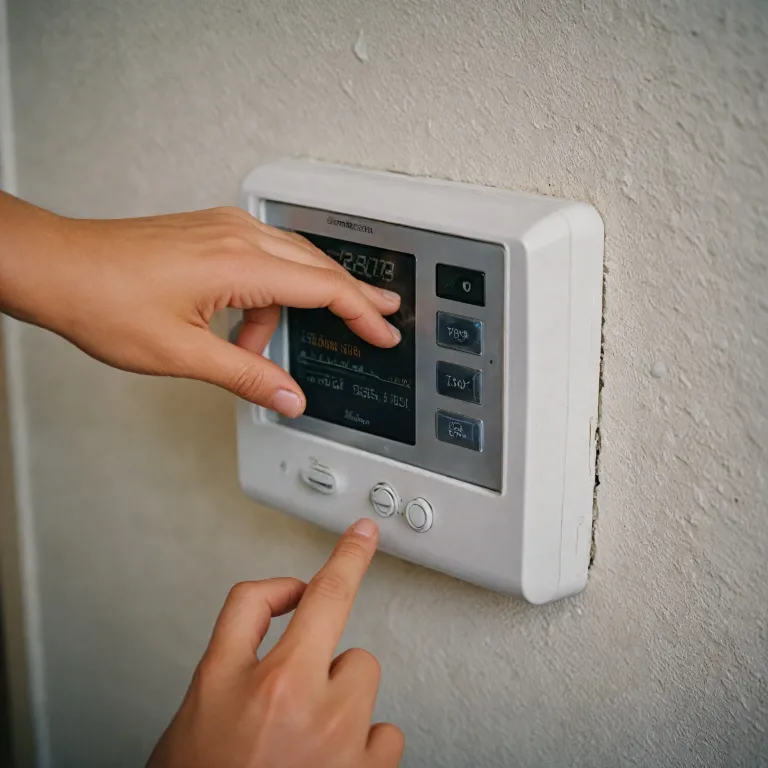
Navigating the world of Honeywell thermostats can be overwhelming, given the variety of models on the market. Before you embark on the task of replacing batteries, it's crucial to familiarize yourself with the specific thermostat model you have in your home. This knowledge ensures that you correctly handle the battery compartment and follow the right procedures tailored to your device. Knowing your thermostat model number is the first step. It can typically be found on the thermostat wall after you remove the cover. Honeywell models, like the Wi-Fi Smart & 7-Day Programmable, each have unique features and battery requirements. Be sure to refer to your user manual as it provides vital details about your model's battery replacement process. Some Honeywell thermostats cover a wide range of series designed for compatibility with various HVAC systems. Models require different steps to replace batteries; thus, having the manual specific to your thermostat model will save you time and prevent unnecessary mistakes. Moreover, different Honeywell thermostats might have varying power sources, with differences in batteries honeywell models use. Identifying these distinctions can aid you in ensuring the comfort of your home's heating and cooling system year round. In case you're uncertain whether smart thermostats require batteries, exploring resources related to your honeywell thermostats will further clarify this aspect of smart home technology. Understanding these subtleties will guide you better when you're gathering necessary tools and preparing for the hands-on part of the battery replacement process.Gathering the Necessary Tools
Essential Tools for a Smooth Battery Replacement
Before you dive into replacing the batteries in your Honeywell thermostat, it’s crucial to gather all the necessary tools and materials. This preparation will ensure a seamless process and help you avoid any unnecessary interruptions. Here’s what you’ll need:
- New Batteries: Most Honeywell models require AA or AAA batteries. Check your manual specific to your thermostat model to confirm the type and number of batteries needed.
- Screwdriver: Some Honeywell thermostats have a battery compartment secured with screws. A small Phillips-head screwdriver is typically sufficient.
- Soft Cloth: Use this to clean the battery compartment and thermostat cover, ensuring no dust or debris interferes with the battery connection.
- User Manual: Having the manual specific to your thermostat model can be invaluable for troubleshooting and ensuring you follow the correct steps.
Once you have these tools ready, you can proceed with confidence, knowing you’re well-prepared to tackle the battery replacement process. Remember, the key to maintaining your thermostat’s efficiency and ensuring year-round comfort is regular maintenance and timely battery replacement.
Step-by-Step Battery Replacement Process
Executing the Battery Swap: Your Handy Guide
Now that you've gathered all the essential tools required for replacing the batteries in your Honeywell thermostat, let’s move on to the actual steps. This guide will help you carry out the operation smoothly, ensuring your thermostat continues to regulate your home’s comfort all year round.
Begin by powering off your HVAC system: Safety first! It’s crucial to minimize any mishaps, so turn off the power source to your HVAC system via the circuit breaker or thermostat wall switch.
Locate and open the battery compartment: Depending on your Honeywell thermostat model, the battery compartment might be front-mounted or located on the back of the unit. Refer to your manual specific to find this if it's not immediately apparent. Typically, most Honeywell models feature a snap-on cover that needs to be gently removed.
Remove the old batteries: Carefully extract the old batteries honeywell from the compartment. Observe any specific orientation for battery placement, as mismatched polarity can affect your thermostat’s performance.
Insert the new batteries: With fresh batteries in hand, align them according to the designated polarity markers inside the battery compartment. Proper placement is key to ensuring optimal operation and longevity of your thermostat.
Reattach the cover: Once the new batteries are securely in place, reattach the cover or snap it back into its original position. Double-check to ensure it fits snugly and that your Honeywell thermostat sits properly on the wall mount.
Power back your HVAC system: Lastly, turn the power back on to your HVAC system. Observe your thermostat for any alerts or irregularities, confirming that you've performed the battery replacement successfully.
With these steps, replacing batteries in Honeywell thermostats should be a straightforward process. For enhanced home comfort, consider integrating external sensors into your existing system for refined climate control. For detailed insights, read more about enhancing home comfort with an external sensor.
Common Mistakes to Avoid
Potential Pitfalls When Switching Out Honeywell Thermostat Batteries
Despite the generally straightforward process of replacing batteries in your Honeywell thermostat, several common mistakes can occur if proper precautions are not taken. By being aware of these potential pitfalls, you can ensure a smooth battery replacement experience that maintains your HVAC system's optimal performance and your home's comfort year round.
- Incomplete Model Identification: It's crucial to verify the specific thermostat model you're dealing with. Different Honeywell models require unique approaches, and missing this step could lead to handling errors. Check the model number typically located on the thermostat wall or in the user manual.
- Not Powering Off: Before replacing batteries, always turn off your HVAC system. This simple action prevents potential short circuits or damage to the thermostat's internal components.
- Incorrect Battery Placement: Honeywell thermostats usually have clear battery compartment diagrams showing correct battery orientation. Failing to place batteries in the right direction can prevent your thermostat from functioning correctly.
- Using The Wrong Battery Type: Always replace Honeywell thermostat batteries with the recommended battery type—commonly AA or AAA. Check your thermostat's manual specific to confirm the correct batteries to use.
- Ignoring Low Battery Warnings: Users might overlook low battery alerts, leading to unexpected thermostat shutdowns. Timely battery replacement helps sustain both function and comfort.
By maintaining vigilance during the battery replacement process and being informed about these common errors, you can effectively sustain the performance and longevity of your Honeywell thermostat. Proper care and attention will ensure your thermostat continues to deliver the desired air comfort and efficiency throughout the seasons.
Maintaining Your Thermostat for Longevity
Ensuring Longevity and Optimal Performance
Maintaining your Honeywell thermostat is essential to ensure it operates effectively and efficiently, providing optimum comfort in your home. Not only does it help in extending the lifespan of the thermostat, but it also enhances the performance of your HVAC system. Here’s how to keep your thermostat in top-notch condition year-round:- Regularly Check Battery Levels: Certain Honeywell models will alert you when it’s time to replace batteries by displaying a low battery indicator. Being proactive about replacing your battery can help avoid potential disruptions in your heating and cooling.
- Inspect the Thermostat Cover: Periodically inspect the exterior and ensure that the cover is tightly fitted. Dust can accumulate over time, so gently clean the device's surface to avoid blocking any sensors or controls.
- Refer to Your Manual: Each thermostat model might have specific maintenance requirements outlined in the user manual. Double-check these guidelines to guarantee you're following the recommended procedures.
- Regular System Checks: Occasionally review your thermostat settings and ensure that your HVAC system is in sync with your comfort preferences. This is especially pertinent when transitioning between seasons.
- Professional HVAC Services: Establishing a routine with certified HVAC services ensures that your heating and cooling systems are regularly maintained and any potential issues with the thermostat are identified early.
Troubleshooting After Battery Replacement
Addressing Post-Installation Hiccups
Even after diligently following the steps to replace the batteries in your Honeywell thermostat, you might encounter some unexpected issues. Let's discuss how to effectively troubleshoot these post-installation challenges to restore your thermostat's optimal performance.- Unresponsive Thermostat Display: If the display fails to light up after installing new batteries, double-check that the batteries have been inserted correctly. Make sure they align with the positive and negative terminals in the battery compartment. It’s also vital to ensure the battery compartment cover is securely attached, as an incomplete closure can sometimes prevent the thermostat from functioning.
- Incorrect Temperature Readings: Post-replacement discrepancies in temperature might occur. Verify that your thermostat model is securely mounted on the thermostat wall, as a loose connection can cause inaccurate readings. Additionally, consult your user manual to confirm that the correct thermostat model settings are applied.
- System Not Turning On: If your HVAC system is not responding to the thermostat after replacing the batteries, check for any tripped circuit breakers in your home that might have affected your HVAC system. Also, ensure that the thermostat is set to the correct mode (heating or cooling), as some Honeywell models require specific configurations.
- Persistent Low Battery Warning: A continued low battery alert even after replacing batteries might indicate an issue with the power source. Try using high-quality batteries recommended for all-year-round durability to alleviate this problem and refer to the thermostat’s manual specific guidance if necessary.
- Consulting HVAC Services: If troubleshooting steps do not resolve the issues, it might be wise to seek help from professional HVAC services. Professionals can diagnose any further complications that may require technical know-how beyond replacing batteries.