Why Choose the Honeywell T4 Thermostat?
Reasons to Opt for the Honeywell T4 Thermostat
Choosing the right thermostat can significantly impact your home's comfort and energy efficiency. The Honeywell T4 thermostat stands out as a reliable choice for several reasons. This programmable thermostat offers a balance of functionality and ease of use, making it a popular option for many homeowners.
One of the key advantages of the Honeywell T4 is its user-friendly design. The thermostat's white interface is intuitive, allowing users to easily navigate through the various settings and controls. Whether you're adjusting the temperature or setting a schedule, the Honeywell T4 makes it straightforward.
Moreover, the Honeywell T4 is compatible with a variety of heating and cooling systems, including single-stage and multi-stage systems. This flexibility ensures that it can integrate seamlessly with your existing setup. The thermostat also supports both heating and cooling modes, providing year-round comfort.
For those who value energy efficiency, the programmable features of the Honeywell T4 are a significant benefit. By setting specific temperatures for different times of the day, you can optimize your energy usage and potentially reduce your utility bills. The thermostat's manual provides detailed instructions on how to program these settings effectively.
Additionally, the Honeywell T4 is designed with privacy and security in mind. It includes features that protect your data and ensure that your system remains secure. This aspect is crucial for users who are integrating the thermostat into a broader smart home system.
For more insights on choosing the right thermostat for your needs, you might find this comprehensive guide helpful.
Preparing for Installation
Getting Ready for a Smooth Setup
Before diving into the installation, preparing correctly can make the process more efficient and stress-free. Ensuring you have all the necessary components and instructions at the ready is crucial. Here's a step-by-step rundown:- Check the Compatibility: Before touching the thermostat box, confirm that your current heating or cooling system is compatible with the Honeywell T4 thermostat. Compatibility varies based on the type of system, whether it's heat stages, cool stages, or a programmable setup.
- Gather Necessary Tools and Materials: If you haven’t already, it’s time to assemble all your tools. You’ll typically need a screwdriver, wire cutter/stripper, and a drill if mounting on the wall. The honeywell installation guide will outline anything specific.
- Ensure Safety First: Always prioritize safety by switching off the power to your existing thermostat from the breaker box before starting the installation. It's a vital step to prevent electric shock.
- Study the User Manual and Installation Guide: Familiarize yourself with the thermostat manual. Manuals often include diagrams and tabs highlighting critical parts of the system, making it easier for you to follow each step closely.
- Settle on a Suitable Location: When deciding where to mount your new thermostat, consider factors like accessibility, user-friendliness, and connectivity within your home system.
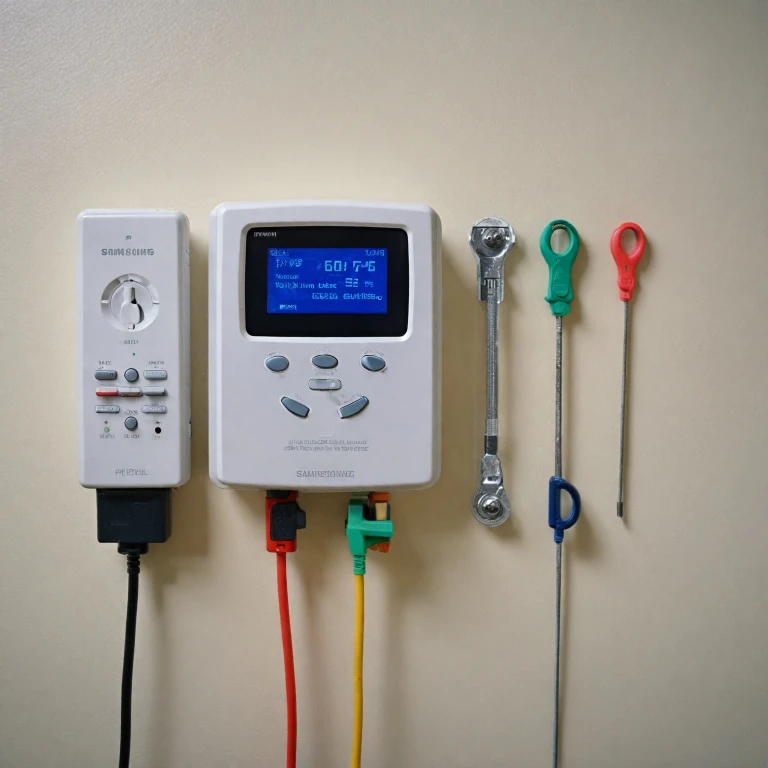
- Take Note of Wiring Set-Up: Pay close attention to the wires connected to your current thermostat. Label them if necessary; this will simplify installing the new Honeywell thermostats.
Step-by-Step Installation Guide
Essential Steps for a Seamless Honeywell T4 Installation
When you're ready to install your new Honeywell T4 thermostat, following a precise installation guide can streamline the process. Begin by ensuring you have the necessary tools and materials prepared, as covered previously. Your thermostat box should include the unit, mounting hardware, and a Honeywell thermostat manual.
Gather Your Tools and Materials
- Screwdriver
- Wire stripper
- Drill (if needed)
- Level
- Power drill
Double-check that you have the correct wires available in your system. If unsure, consult your thermostat installation guide or a professional to avoid complications.
Mounting the Thermostat
- Turn off the power to your heating and cooling system to prevent any hazards.
- Remove the existing thermostat, being careful not to damage the existing wires. Label the wires based on their terminals, which will assist during the reinstallation.
- Using the provided mounting hardware, secure the thermostat's backplate to the wall. Make sure it's level to ensure accurate effectiveness.
Connecting the Wires
- Follow the wire labels and Honeywell manual to connect each wire to the corresponding terminal on the thermostat backplate.
- Ensure that all connections are tight and secure.
Finalizing Installation
After connecting the wires, attach the thermostat to the mounted backplate. Restore power to the heating system and follow the user manual for system test and installer setup. Make sure to check the cool stages and heat stages to verify proper operation.
For further tips on integrating this programmable thermostat seamlessly into your smart home system, refer to additional resources which may include guides on selecting compatible accessories.
Common Installation Challenges and Solutions
Overcoming Installation Obstacles
- Power Supply Issues: One of the most common problems is powering your Honeywell T4 thermostat. Ensure that the power supply aligns with the manual's specifications. Checking the thermostat manual for details on compatible systems and required voltage could help prevent this issue.
- Incorrect Wiring: Incorrectly connecting wires can lead to syncing issues with your heating or cooling systems. Refer to your installation guide or user manual to verify wire connections. Notably, the manuals often include a wire tab that serves as a handy reference during setup.
- Conflict with Existing System: When integrating with a pre-existing setup, such as a heating system or smart home thermostat system, conflicts might arise. In this case, consulting the installer setup guide or seeking professional advice might be necessary.
- Pro Tip: Conducting a system test post-installation ensures all connections align appropriately, and thermostats communicate correctly with your heating cooling elements.
These common challenges frequently emerge during installation. Armed with the manual honeywell pro and programmable thermostat guidelines, you can often resolve them independently. For further confidence, many users find reassurance by consulting a detailed installation guide or privacy policy from Honeywell, which provides insights into troubleshooting specific problems.
Integrating the T4 with Your Smart Home System
Making Your Home Even Smarter with Honeywell T4 Integration
Integrating the Honeywell T4 thermostat into your smart home system allows for seamless operation and enhanced control over your home environment. Here’s how to approach this task effectively:- Compatibility Check: Before beginning the integration, verify that your existing smart home system supports the Honeywell T4 model. This will ensure a smoothe connection experience, and avoid any technical hiccups down the line.
- Connecting to Wi-Fi: The Honeywell T4 thermostat requires a robust Wi-Fi connection for optimized performance. During the installation, make sure your Wi-Fi network is reliable, and follow the guidelines in the thermostat manual for a detailed walkthrough on connecting the device to your network.
- Using the App: To fully realize the benefits of a smart thermostat, download the Honeywell Home app. This app serves as a central hub where you can customize settings, such as programmable temperature controls, schedule heat or cool stages, and manage power settings from the comfort of your smartphone.
- Hands-Free Operation: Consider integrating your Honeywell T4 thermostat with voice-activated systems like Google Assistant or Amazon Alexa. This lets you control your heating and cooling settings without having to toggle through tabs or reference user manuals manually.
- System Customization: The T4 offers a variety of customizable features, accessible through both the app and the thermostat itself. You can adjust heating cycles, set privacy policies, or even conduct a system test to ensure everything is functioning properly.
- Scheduling and Controls: Benefit from the thermostat's programmable capabilities. With a few simple steps, you can set daily schedules to manage your heating system effectively, ensuring comfort across all days of the week.
Maintenance and Troubleshooting Tips
Preserve Optimal Performance
Maintaining your Honeywell T4 thermostat is crucial to ensure that your heating and cooling system runs smoothly. Regular upkeep not only extends the lifespan of your thermostat but also guarantees a consistent and comfortable climate in your home.
Troubleshooting Common Issues
- No Display on Thermostat: Check the power supply from your heating system to the thermostat. Ensure that the main power switch is turned on and check for any tripped breakers.
- Incorrect Temperature Reading: Ensure that the thermostat is installed away from direct sunlight, drafts, or heat sources that may affect its ability to accurately gauge room temperature.
- Inconsistent Heating or Cooling: Verify the programming settings on your programmable thermostat. Refer to your user manual to see if the correct heat stages and cool stages are activated.
- WiFi Connection Issues: Restart your router and the thermostat to re-establish connection. Check your user guide for specific network troubleshooting steps.
Routine Maintenance Tips
Routine checks are essential to keep your smart thermostat in top condition. Here’s what you can do:
- Consult the Honeywell T4 manual for detailed guidance on your specific model.
- Regularly dust and clean the thermostat to prevent any obstruction in the operation or programming tabs and buttons.
- Reset the system by following the steps in the installation guide.
- Conduct a system test to check both heating and cooling functions are operational.
Installation and Upgrades
If you're planning to upgrade your heating system or add new features, make sure it's compatible with your Honeywell T4 thermostat. The installation guide provides details on wiring and system codes necessary for a successful integration. Remember, professional installation may be recommended depending on the complexity of your heating system.
Following these maintenance and troubleshooting tips, you can ensure that your Honeywell thermostat remains efficient and reliable, providing you with exceptional control over your home’s temperature. For more detailed instructions and troubleshooting, refer to the official thermostat manuals and guides.