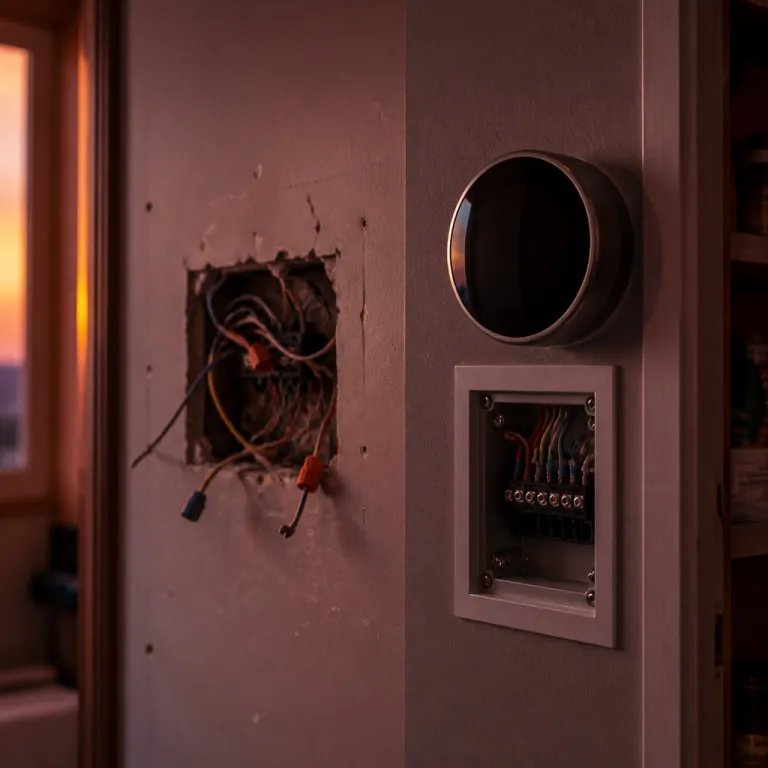
When smart thermostat DIY is truly simple
A standard gas furnace with a split air conditioning system is the cleanest case. In this setup, a single thermostat usually controls both heating and cooling through one straightforward hvac system that already has a C wire for power. For most renters or first time buyers, this is where a smart thermostat DIY or pro install decision leans heavily toward a confident diy installation.
Look behind your existing thermostat and count the wires before you install smart controls. If you see a tidy bundle with labels like R, C, W, Y, and G connected to a single system board, you are probably in the “easy thermostat installation” category with low risk. These simple systems usually pair well with mainstream smart thermostats such as Google Nest Thermostat, Ecobee3 Lite, or Tado models, which are designed for standard hvac systems with one zone.
In these clean cases, the installation cost is mostly your time and a bit of patience. You shut off power to the hvac installation at the breaker, remove the old thermostats, label each wire, and mount the new base plate carefully. The main costs are the thermostat itself and maybe a drill bit, while the long term energy savings from better heating cooling control can easily outweigh those upfront costs.
For this kind of system, a professional hvac contractor or licensed electrician rarely adds much value. A careful homeowner can follow the manual, match each wire to the same terminal name, and complete the install without touching any plumbing heating components or opening the furnace cabinet. If you are comfortable replacing a light fixture and reading a wiring diagram, this level of smart thermostat installation is well within reach.
Quick compatibility snapshot for simple systems
| Wiring and system type | Typical example | Recommended approach |
|---|---|---|
| R, C, W, Y, G to one control board | Single stage gas furnace + central AC | DIY smart thermostat installation is usually safe |
| R, W only, no C wire | Older furnace, heat only | DIY possible with caution or power kit; consider pro help |
| Five or more active wires with labels like W2, Y2, O/B | Heat pump or multi stage equipment | DIY only if you are experienced; pro install often wiser |
Simple wiring diagram example
Imagine a basic thermostat backplate with five screw terminals in a row: R (power), C (common), W (heat), Y (cooling), and G (fan). In a standard installation, a red wire lands on R, a blue or black wire on C, a white wire on W, a yellow wire on Y, and a green wire on G. When you move to a new smart thermostat, you transfer each labeled wire to the matching terminal, keeping the same letters even if the colors differ.
Borderline wiring: when DIY starts to get tricky
Things get more complicated when the thermostat wiring does not include a C wire. Many smart thermostat models need constant power, and without that common wire they may rely on battery power or power stealing, which can stress some hvac systems. This is where the smart thermostat DIY or pro install choice becomes less obvious for a cautious homeowner.
If your existing thermostat only has two or three wires, or if you see unusual colors without clear labels, pause before any diy installation. Some smart thermostats ship with power extender kits that create a virtual C wire at the furnace control board, but installing those kits means opening the hvac system cabinet and working near high voltage connections. For many renters, that step crosses the line from simple thermostat installation into work that feels closer to professional installation territory.
There is also a difference between older low power heating systems and modern high efficiency models of heat pumps or multi stage furnaces. A dual fuel heat pump with gas backup, or a multi stage system with five or more active wires, can be sensitive to wiring mistakes that affect both air conditioning and heating performance. In these borderline cases, the potential energy savings from a smart thermostat must be weighed against the risk of miswiring that could damage the system or erase any savings through repair costs.
If you still want to install smart controls yourself in a tricky wiring situation, choose hardware designed for that scenario. Some of the best smart thermostats without a C wire include models that ship with robust power kits and clear diagrams for complex hvac systems, and guides that explain how each wire maps to your existing system. When the instructions start to look like a schematic for an airplane cockpit, that is your signal to reconsider whether a professional hvac contractor or an experienced hvac technician might be worth the installation cost.
Borderline wiring decision guide
| What you see at the thermostat | What it usually means | Suggested action |
|---|---|---|
| 2–3 unlabeled wires, no C | Older boiler or furnace, heat only | Check manual carefully; lean toward professional installation |
| Four or more wires, but no C | AC and heat on shared power, no dedicated common | Use manufacturer power kit or call an hvac technician |
| Labels like W2, Y2, AUX, O/B | Heat pump or multi stage configuration | DIY only if you understand staging; otherwise hire a pro |
Systems where a professional is usually worth the cost
Certain hvac systems are unforgiving when it comes to thermostat wiring mistakes. Communicating systems such as Carrier Infinity, Trane ComfortLink, or Lennox iComfort use digital communication between the thermostat and the indoor and outdoor units, which means a standard smart thermostat may not be compatible at all. Official compatibility charts from brands like Google Nest and Ecobee generally flag these systems as “not supported” or “requires adapter,” so trying a smart thermostat DIY or pro install approach on these systems without research can lead to a dead screen and an expensive service call.
Zoned systems, where multiple thermostats control dampers to direct air to different parts of the home, add another layer of complexity. Each thermostat may connect to a zone control board, which then talks to the main hvac system, and miswiring a single wire can lock dampers closed or overheat a zone. In these homes, professional installation by a qualified hvac technician or licensed electrician is usually the safest path, because the cost of a mistake can include warped ductwork or a fried control board.
Heat pumps with separate auxiliary heat on another transformer are another red flag for diy installation. These systems often have more wires, more control modes, and more ways to misconfigure heating cooling stages, which can silently waste energy or run electric strips when only the heat pump should operate. A professional hvac contractor who understands both the electrical side and the plumbing heating aspects of the equipment can configure advanced thermostat models to balance comfort, energy savings, and equipment protection.
There is also the ecosystem question, which matters for long term satisfaction. Choosing between HomeKit, Google Home, or Alexa as the deciding factor for your smart thermostats can influence which brands support your specific hvac installation and which ones offer reliable control features. When your system is complex and your smart home is growing, paying for professional installation can buy peace mind that everything from the thermostat to the voice assistant works as one coherent system.
Typical complex systems that favor pro installation
| System type | Why DIY is risky | Preferred installer |
|---|---|---|
| Communicating hvac (e.g., Carrier Infinity) | Uses proprietary digital signals; limited smart thermostat compatibility | Manufacturer-trained hvac contractor |
| Zoned systems with multiple thermostats | Zone boards and dampers can be damaged by miswiring | Experienced hvac technician |
| Heat pump with separate auxiliary heat transformer | Incorrect staging can overuse electric heat and raise bills | Licensed electrician or hvac pro |
Running the numbers: risk, cost, and long term savings
On paper, a midrange smart thermostat might cost around the price of a nice dinner for two. A service call from a professional hvac company can easily double or triple that cost, especially if the visit includes both an hvac technician and a licensed electrician. In many regions, a basic diagnostic visit runs roughly $100–$200, while more involved thermostat installation or wiring repair can push the bill toward $300 or more, so the smart thermostat DIY or pro install decision often comes down to how you value risk versus potential savings.
Consider the worst case scenario for a rushed diy installation on a complex hvac system. A miswired thermostat can short low voltage circuits, damage a furnace control board, or confuse a heat pump into running auxiliary heat constantly, which drives up energy costs and erases any expected energy savings. Replacing a modern control board can cost as much as several high end models of smart thermostats, often in the $400–$800 range including parts, and that does not include the labor costs for diagnosis and repair.
Now compare that risk to the long term benefits of a correctly installed smart thermostat. Over several heating seasons and cooling months, features like learning schedules, occupancy sensing, and remote control can generate meaningful savings on both gas and electricity. Utility and manufacturer studies commonly estimate heating cooling reductions in the 8–15 percent range, so when you spread the installation cost and the thermostat price over the expected lifespan of the device, even a professional installation can pay for itself through reduced energy use and better control of heating cooling cycles.
There is also the value of time and peace mind. If you enjoy projects and understand basic wiring, diy installation on a simple system can be satisfying and cost effective, especially when you document every wire and follow the manual carefully. If you dread opening the wall plate or your hvac systems look like a control room, paying for professional installation is not a failure, it is an insurance policy against bigger costs later.
Numbers and sources to sanity check expectations
Manufacturer and utility research, such as reports from Nest and Ecobee, typically cites average heating and cooling energy savings in the 8–15 percent range for properly configured smart thermostats. Local contractor price sheets and consumer surveys often show service call fees in the $100–$200 band, with more complex thermostat installation or control board replacement reaching $300–$800 or higher depending on region and equipment. Always confirm current pricing and savings estimates with your local hvac company and your utility, because rates and incentives vary by market.
A practical checklist before you touch a single wire
Before you loosen a single screw on your existing thermostat, take photos. Capture the wiring from multiple angles, zoom in on each terminal, and note any jumpers or unusual connections that tie different terminals together. These photos become your safety net if you need to reverse the smart thermostat DIY or pro install attempt or call in a professional later.
Next, label every wire with the letter printed on the terminal, not just the color. Colors are suggestions, but the letter tells you the actual function in your hvac system, whether it is heating, cooling, fan, or common. Use the labels that ship with most smart thermostats or make your own, because clear labels reduce the chance of mixing up wires during thermostat installation or future upgrades.
Then, map your system type using the manual from your furnace, air handler, or heat pump. Identify whether you have a single stage furnace, a multi stage system, a heat pump with auxiliary heat, or a zoned setup with multiple thermostats feeding a central board. If anything about the wiring diagram or the number of wires does not match the simple examples in your smart thermostat manual, that is your cue to pause and reconsider whether diy installation is still the right path.
Finally, run a quick self check on your comfort goals and risk tolerance. If your priority is maximum energy savings and you are comfortable learning about hvac installation details, a careful diy approach on a simple system can be rewarding. If your priority is reliability and you own an expensive hvac system with complex controls, calling a professional hvac contractor for installation may be the smarter long term move, because what really matters is not the app interface, but the February gas bill.
Fast troubleshooting tips after installation
| Symptom | Likely cause | First step |
|---|---|---|
| Thermostat screen is blank | No power from R/C, tripped breaker, or blown low voltage fuse | Verify breaker, check that R and C are firmly connected |
| Heat runs but cooling does not | Y wire miswired or not fully seated | Confirm Y wire is on the correct terminal at both ends |
| Fan runs constantly | G wire shorted or fan mode set to “On” instead of “Auto” | Switch fan to “Auto” and inspect G connection |
FAQ
How do I know if my system is safe for DIY thermostat installation ?
Check behind your current thermostat for a clean set of labeled wires, usually R, C, W, Y, and G, all going to a single control board. If you have a single zone gas furnace with standard air conditioning and a visible C wire, your system is typically safe for a smart thermostat DIY or pro install choice that favors DIY. Multiple thermostats, unlabeled wires, or unusual equipment labels suggest you should at least consult a professional hvac technician.
Is a C wire absolutely required for smart thermostats ?
Many smart thermostats work best with a C wire because it provides constant power for Wi Fi, screens, and advanced control features. Some models can operate without it using batteries or power stealing, but that can cause issues with certain hvac systems, especially older furnaces or heat pumps. If you lack a C wire and no power kit is available, professional installation may be safer than experimenting with improvised wiring.
When should I definitely call a professional for thermostat installation ?
You should call a professional when you have a communicating hvac system, a zoned setup with multiple thermostats, or a heat pump with separate auxiliary heat on another transformer. These systems have complex wiring and control logic, and a mistake can damage expensive components or reduce energy savings by running the wrong heating cooling stages. In such cases, the installation cost for a professional hvac contractor is usually far less than the potential repair costs.
Can a smart thermostat really lower my energy costs long term ?
A properly installed smart thermostat can reduce energy use by optimizing schedules, reducing heating and cooling when you are away, and providing better control over temperature swings. Over several years, these energy savings can offset both the thermostat cost and even a moderate professional installation fee. The key is correct wiring, accurate system configuration, and using features like eco modes and remote control consistently.
What should I do before scheduling professional installation ?
Before you book a visit, take clear photos of your existing thermostat wiring, note your equipment model numbers, and decide which smart thermostat models interest you. Share this information with the hvac technician or licensed electrician so they can confirm compatibility and estimate installation costs accurately. This preparation helps avoid surprises on the day of the visit and ensures the professional installation delivers both comfort and peace mind.